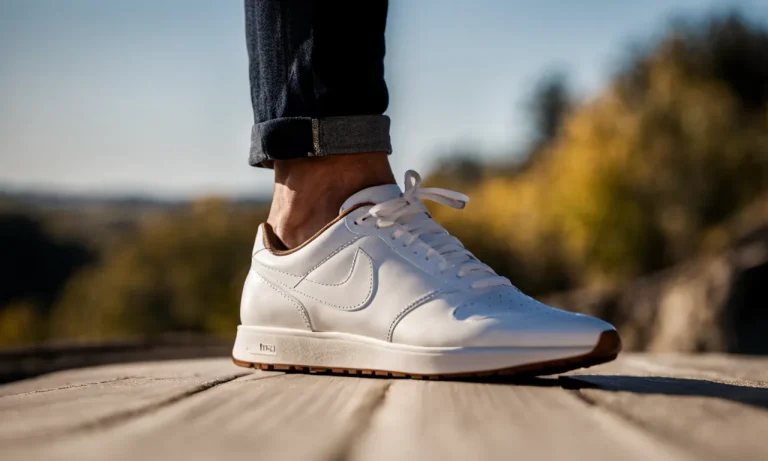
If you love your white sneakers, keeping the soles clean can seem like an endless battle. From simple dust and dirt to stubborn stains, it takes effort to keep those soles looking fresh and bright. But with the right techniques and products, you can get your kicks looking crisp and new again.
If you’re short on time, here’s a quick answer to your question: Mix a solution of warm water, dish soap, and baking soda. Scrub gently with a soft-bristled brush, then rinse well and air dry. Repeat as needed for tough stains.
In this comprehensive guide, we’ll cover everything you need to know to clean white sneaker soles. You’ll learn about the best products to use, simple cleaning techniques, how to tackle stubborn stains, maintenance tips to keep soles looking new, and when it’s time to consider professional sneaker cleaning services.
Assess the Damage: Types of Dirt and Stains
Before diving into the process of cleaning your white sneaker soles, it’s important to assess the damage. Understanding the types of dirt and stains on your sneakers will help you determine the best cleaning method to use. Here are the common types of dirt and stains you may encounter:
Surface dirt and dust
Surface dirt and dust are the most common types of stains found on white sneaker soles. These are usually caused by everyday wear and can easily be removed with a simple cleaning routine. Using a soft-bristle brush or a damp cloth, gently scrub the surface of the soles to remove any dirt or dust particles.
This will help restore the white color and give your sneakers a fresh look.
Mud and wet stains
Walking in muddy or wet conditions can leave stubborn stains on your white sneaker soles. If your sneakers have mud or wet stains, start by letting the mud dry completely. Once dry, use a brush or toothbrush to gently remove the dried mud.
For wet stains, blot the excess moisture with a paper towel and then follow the same cleaning routine as for surface dirt and dust.
Oil-based stains
Oil-based stains, such as grease or food spills, can be a bit trickier to remove from white sneaker soles. If you have oil-based stains, try using a mild dish soap or laundry detergent mixed with warm water. Apply the soapy solution to the stained area and gently scrub with a soft-bristle brush.
Rinse thoroughly and repeat if necessary. For stubborn oil stains, you may need to use a specialized sneaker cleaner or seek professional help.
Scuffs and abrasions
Scuffs and abrasions are common signs of wear and tear on white sneaker soles. While they may not be actual stains, they can make your sneakers look dull and worn out. To tackle scuffs and abrasions, you can use a magic eraser or a mixture of baking soda and water.
Gently rub the affected areas in a circular motion until the scuffs fade away. Remember to be gentle to avoid damaging the sole material.
Remember, different stains may require different cleaning methods. It’s important to assess the damage and choose the appropriate cleaning technique to achieve the best results.
Gather the Right Cleaning Supplies
When it comes to cleaning white sneaker soles, having the right supplies is essential. Here are some items you’ll need to gather before getting started:
Dish soap
Dish soap is a versatile cleaning agent that can effectively remove dirt and stains from white sneaker soles. It is gentle enough to use on most materials and won’t damage the surface. Simply mix a small amount of dish soap with water to create a soapy solution.
Baking soda
Baking soda is known for its cleaning and deodorizing properties. It can help remove tough stains and eliminate odors from white sneaker soles. Create a paste by mixing baking soda with a small amount of water, then apply it to the soles and scrub gently with a brush.
White vinegar
White vinegar is another effective cleaning agent that can be used to remove stains and disinfect white sneaker soles. Mix equal parts white vinegar and water, then use a cloth or sponge to apply the solution to the soles. Let it sit for a few minutes before wiping it off with a clean rag.
Toothbrush or other soft-bristled brush
A toothbrush or a soft-bristled brush is ideal for scrubbing the dirt and grime off white sneaker soles. Make sure to choose a brush with soft bristles to avoid scratching the surface. Gently scrub the soles using circular motions to lift off any dirt or stains.
Clean rags or paper towels
Clean rags or paper towels are essential for wiping away dirt, excess cleaning solution, and moisture from the soles. Choose absorbent materials that won’t leave lint or residue behind.
Optional: Magic eraser, sneaker cleaner, laundry detergent
If you’re dealing with stubborn stains or heavily soiled white sneaker soles, you may want to consider using additional cleaning products such as a magic eraser, sneaker cleaner, or even laundry detergent.
These products are specifically designed to tackle tough stains and restore the whiteness of your sneakers.
Remember to always read and follow the instructions provided by the manufacturer of the cleaning products you choose to use. It’s also a good idea to test any new cleaning solution on a small, inconspicuous area of the sneaker sole before applying it to the entire surface.
Now that you have gathered the right cleaning supplies, it’s time to move on to the next step: preparing your sneakers for cleaning.
Cleaning Techniques for Common Stains and Soiling
Mix a basic cleaning solution
When it comes to cleaning white sneaker soles, a basic cleaning solution can work wonders. Start by mixing a small amount of mild detergent with warm water in a bowl. Stir the solution until it becomes soapy, but be careful not to create too many suds.
This mixture will serve as the foundation for cleaning your white sneaker soles.
Scrub gently with a brush
Once you have your cleaning solution ready, dip a soft-bristled brush into the soapy mixture. Gently scrub the soles of your sneakers in a circular motion. Pay close attention to any areas that have visible stains or dirt buildup.
Avoid using excessive force, as this can damage the material of your sneakers.
Blot away excess moisture
After scrubbing the soles of your sneakers, use a clean, dry cloth to blot away any excess moisture. Make sure to remove as much water as possible to prevent it from seeping into the fabric of your shoes. This step will also help speed up the drying process.
Repeat as needed for stubborn stains
If you encounter stubborn stains that are not easily removed with the basic cleaning solution, don’t worry. Simply repeat the cleaning process, focusing on those specific areas. Sometimes, more persistent stains require a bit of extra effort to remove. Patience and persistence are key.
Use stain-fighting products for oil, grease
For oil or grease stains that are particularly stubborn, you may need to use specialized stain-fighting products. There are various options available in the market, such as stain removers specifically designed for sneakers.
Follow the instructions provided with the product, and be sure to test it on a small, inconspicuous area of your sneakers first to ensure it doesn’t cause any damage.
Consider magic eraser for scuffs
If you have scuff marks on your white sneaker soles, consider using a magic eraser. These handy cleaning tools work like magic to remove scuffs and marks from various surfaces, including sneaker soles. Simply dampen the magic eraser and gently rub it over the scuff marks until they disappear.
Just be sure to test the magic eraser on a small area first to ensure it doesn’t cause any discoloration.
Caring for Soles after Cleaning
Once you have successfully cleaned the white sneaker soles, it is important to take extra steps to ensure their longevity and maintain their pristine appearance. Here are some tips on how to care for the soles after cleaning:
Allow shoes to fully air dry
After cleaning the soles, it is crucial to allow them to fully air dry before wearing the sneakers again. This will prevent any moisture from getting trapped inside the shoes, which can lead to unpleasant odors and the growth of bacteria.
Additionally, wearing damp shoes can cause discomfort and may even damage the material over time. To speed up the drying process, you can place the shoes in a well-ventilated area or use a fan.
Use crumpled paper to help retain shape
To prevent the soles from losing their shape while drying, you can stuff the shoes with crumpled paper. This will help the sneakers maintain their form and prevent any misshaping that could occur as a result of the cleaning process.
It is important to use enough paper to fully fill the shoes, but not so much that it stretches the material. This simple step can make a significant difference in the overall appearance and fit of your white sneakers.
Apply protective spray after drying
Once the soles are completely dry, it is highly recommended to apply a protective spray specifically designed for sneakers. These sprays provide an additional layer of protection against dirt, stains, and water damage.
They can help prolong the lifespan of your white sneaker soles and make future cleaning tasks easier. Make sure to follow the instructions on the spray bottle for best results.
By following these simple steps, you can ensure that your white sneaker soles remain clean, durable, and looking their best for a long time. Remember, taking care of your shoes not only enhances their appearance but also extends their lifespan, saving you money in the long run.
Maintenance and Prevention
Add protective soles
One of the best ways to maintain the cleanliness of your white sneaker soles is to add protective soles. These can be in the form of clear adhesive stickers or rubber soles that you attach to the bottom of your shoes.
The protective soles act as a barrier between the ground and your white soles, preventing dirt and stains from directly adhering to them. This simple step can greatly extend the lifespan of your sneakers and make them easier to clean in the long run.
Spray shoes before wearing
Before wearing your white sneakers, it’s a good idea to spray them with a protective spray. This spray helps create a barrier on the surface of the shoes and repels dirt and stains. Look for a spray specifically designed for sneakers or one that is suitable for various types of fabric.
By taking this preventive measure, you can minimize the amount of dirt and grime that sticks to your sneakers throughout the day.
Wipe down after each use
After each use, it’s important to wipe down your white sneaker soles. Use a soft cloth or a damp sponge to gently remove any dirt or stains that may have accumulated. Be sure to pay attention to the edges and crevices where dirt can easily hide.
By incorporating this quick cleaning routine into your daily or weekly habits, you can prevent dirt from building up and becoming more difficult to remove over time.
Store properly when not in use
Proper storage is key to keeping your white sneaker soles in pristine condition. When you’re not wearing your sneakers, make sure to store them in a cool, dry place away from direct sunlight. Avoid placing them on surfaces that can transfer color, such as dyed fabrics or newspapers.
Additionally, consider using shoe trees or stuff them with tissue paper to help maintain their shape and prevent any potential yellowing or discoloration.
By following these maintenance and prevention tips, you can keep your white sneaker soles looking fresh and clean for longer periods of time. Remember, taking care of your sneakers not only enhances their appearance but also prolongs their lifespan, saving you money in the long run.
Conclusion
With the right mix of products, technique and elbow grease, you can get your beloved white sneakers looking crisp and clean. While it does take some effort, you can care for your kicks at home without having to resort to expensive professional cleaning.
Just be sure to clean spills and stains right away, allow time for thorough drying, and take steps to protect your sneakers in between wears. With proper care and maintenance, your shoes will stay fresh and bright for many miles to come.